


宇骐五大优势
我们提供各种各样灵活、可靠且快速的服务,旨在满足您的需求。
多年物流经验
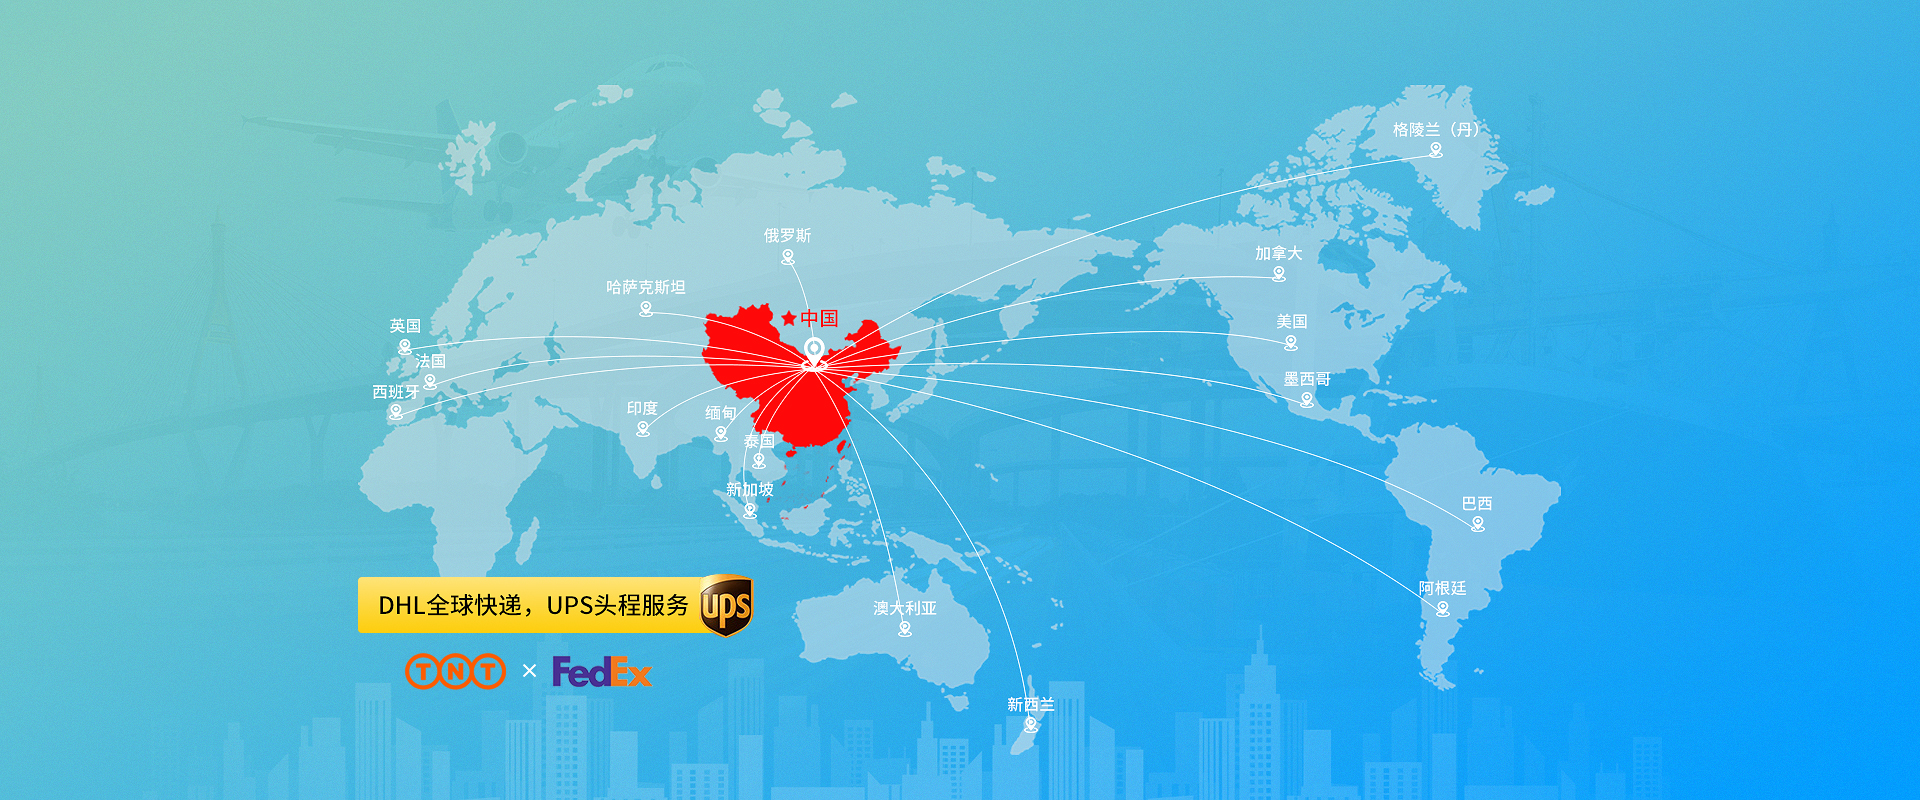
15年行业经验,与多家世界500强企业 签订合作协议
专业、快捷、安全的综合 物流服务
11年行业经验,与多家世界500强企业 签订合作协议
专业服务团队
专业的服务团队,为您提供一对 一的服务可以根据不同的需求为您量身定制 为您排忧解难!
GPS全程定位跟踪
拥有自已的车队,GPS全程定位跟踪
运费结算方式灵活
运费结算方式灵活,根据不同情况可以现结 月结,货到付款等
亚搏网站-亚搏(中国)
我们提供各种各样灵活、可靠且快速的服务,旨在满足您的需求。

深圳市亚搏网站-亚搏(中国) 有限公司
走进亚搏网站-亚搏(中国)
让每个信任我们的客户放心

手机官网

小程序

有限公司")

有限公司")